

Nessan Cleary talks to Asanti user Barry Laver of Wincanton Print about his experiences with this wide-format workflow solution.
As wide-format printing continues to grow, so too do the individual service providers with most now having multiple printers. That usually means having to manage multiple Rips, which can complicate the workflow. We've taken a closer look at some of the issues around workflow and the various software options available elsewhere in this issue, but for this story we'll concentrate on just one of these - Agfa's Asanti - which was formally announced at the London Fespa show in June 2013 and has been shipping with most Agfa wide-format printers since the start of this year.
One of the first companies in the UK to try Asanti was Wincanton Print, based in Somerset. The company started off as a litho printer and has a brace of Heidelberg SpeedMaster presses but has also added a wide-format element over the last two years. Wincanton was already using Agfa's Apogee workflow for its litho so it was open to beta testing the Asanti workflow and has since opted to stick with it.
The wide-format side of the business boasts an Agfa Anapura 2050 UV printer, plus Mimaki JV33 and JV160 solvent printers and a Zund G10 cutting table. These now all run through the Asanti system. Wide-format manager Barry Laver says that the best feature is its ease of use.
Asanti comes with a standard set of production set-ups with calibration curves and profiles that can be combined with different print modes, which Agfa claims delivers good print quality out of the box. These profiles can then be urther tweaked fairly quickly without the need to print out thousands of colour patches, which is handy if you have to use different substrates.
Laver says that using Asanti has improved the overall print quality and productivity, explaining that the Shiraz Rip that previously ran the Mimaki's was a bit hit and miss in terms of its colour management. “Agfa Asanti colour corrected everything so that the colour comes out right every time regardless of the substrate, where before it used to vary quite a lot”, he says.
For the Anapurna, Agfa set up profiles to give a choice between best quality and faster productivity, which has helped Laver get the best out of the machine. He found that there used to be issues with the Wasatch Rip used previously in that it didn’t always manage to flatten all the layers in the job, which was only apparent once it was printing so that the job would have to be redone. Laver says these problems have disappeared since switching to Asanti.
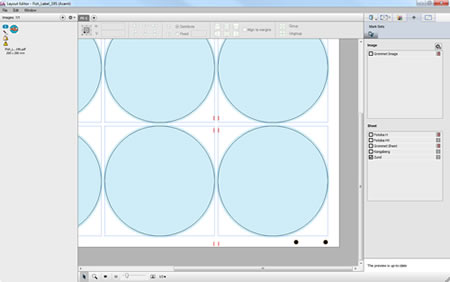
Assanti will even handle some of the cutting requirements as Laver explains: “If it's just a normal straight cut then Asanti does it itself, but if it has an eyelet then it needs a crease and it has to be drawn up beforehand.”
Laver has also found Agfa to be helpful and able to sort problems out quickly, and points out that the company can dial into the system remotely to update it.
Overall, Laver says that the system does exactly what Agfa had originally promised, improving both the print quality and tightening up the production processes so that productivity has gone up while reducing errors.
About the product
Agfa is no stranger to workflow software, having developed the highly successful Apogee prepress workflow that is widely used in commercial printing. Asanti borrows heavily from this. It consists of several modules based around a Rip core called Asanti Render, which uses the Adobe PDF Print Engine v 3.0 to Rip files for wide-format output. Agfa claim that although most workflows are now built on APPE, it is able to get more out of this thanks to its experiences with Apogee. Agfa supplies the Render module with all new wide-format printers.
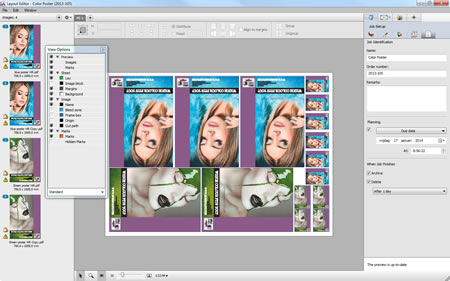
The workflow part of it is the Production module, which includes preflight checks based on profiles that operators can tweak. There is some ability to optimise layout for repeated jobs though nesting of jobs that have irregular shapes is an optional extra. It can also add marks for finishing processes and archive jobs automatically. Asanti includes Agfa’s proven colour management so that jobs can be set up once, and then the results output to various printers, including both Agfa and non-Agfa printers.
Naturally, Asanti also includes its own Web-to-print module, StoreFront, which can be used to set up multiple Web-based stores to target different markets. There’s an online editor so customers can add their own text or QR codes. Customers can choose from a library of designs or upload their own files, which can then be preflighted. It also supports related products, such as mounting brackets or stands.
There are various optional add-ons, such as licenses for additional print engines or connections to MIS.
Alternatives
There are several different ways to approach workflow, including a number of dedicated workflow programs.
GMG
The main competition comes from GMG, which has developed ProductionSuite, a program that essentially adds a workflow element to GMG’s proven colour management expertise. It’s a modular system that separates the preparation of each file from the actual output. Thus the main part of the system is the Editor, which uses templates to help operators preflight and organise files quickly. The Ripping is handled by the Rip module, with the actual output via a PrintStation, for which you will need one per output device. There’s also a SmartProfiler module for creating and managing colour profiles. It can match colour output across multiple devices, including handling spot colours to match the media in use. There’s an EcoSave function, which is one of the benefits of decent colour management in reproducing colours accurately with the minimum amount of ink usage – GMG estimates that it can save up to 20% of the ink without loss of colour quality. The system also includes TrueShape nesting that can place jobs with irregular shapes together to save media usage.
SAI
SAi has also developed a workflow system, PixelBlaster, which licenses the same underlying technology as ProductionSuite. Consequently it has a similar structure, based around the Central module, which lets users preflight and prepare jobs. This also includes setting up finishing marks, such as grommet holes as well as tiling and colour management. However, the actual colour profiles are managed through a separate Profiler module.
There’s a View module that uses Ripped date to check that files have rendered correctly, including transparencies, blends and layers. There’s a Q module that controls nesting and manages the print queue, though the heavy lifting is done by the Engine module, which includes drivers for over 800 output devices. You’ll need additional Engines for each output device but they can be used together for load balancing.
Finally, there’s a Library module that archives jobs and media libraries so that those jobs can easily be reproduced again without any fuss.
ESKO
Esko’s Automation Engine has also proven popular with wide- format users, particularly for producing 3D objects such as POS boxes. It’s designed to work with other Esko design software, such as ArtPro or PackEdge and includes a Shuttle module to link these to the workflow. It can also link to MIS to automatically pick up data on a job such as barcodes or step and repeat information.
{jathumbnail off}